Just In
- 1 min ago

- 29 min ago

- 1 hr ago

- 2 hrs ago

Don't Miss
- Sports
 T20 World Cup 2024: Top 5 Indian Batters Whose IPL 2024 Performances Lay Claims For India Selection
 - Lifestyle
 Exclusive: Expert Shares Impact of Heat Waves on Infectious Disease Transmission
 - Finance
 US Federal Reserve Chair Jerome Powell Hints A Delay In Rate Cuts Amid Inflationary Pressure
 - Movies
 Top 5 Hottest Blouse Designs By Kareena Kapoor To Slay! From Strapless To Jacket, Check BEST Picks
 - News
 Explained: What Caused Heavy Rains & Storm In The UAE?
 - Automobiles
 India's Automobile Market: Diesel Cars Maintain Their Ground Amidst Petrol Shift
 - Education
 UPSC Success Story: An IITian, A Government Job Holder at Railways, Quit the Job and Emerged as an IAS
 - Travel
 From Coconut Breaking on Head to Men Dressing as Women: 12 Unique Indian Rituals Explored
How to Install Android Lollipop on Samsung Galaxy S5: Here are 10 Easy Steps
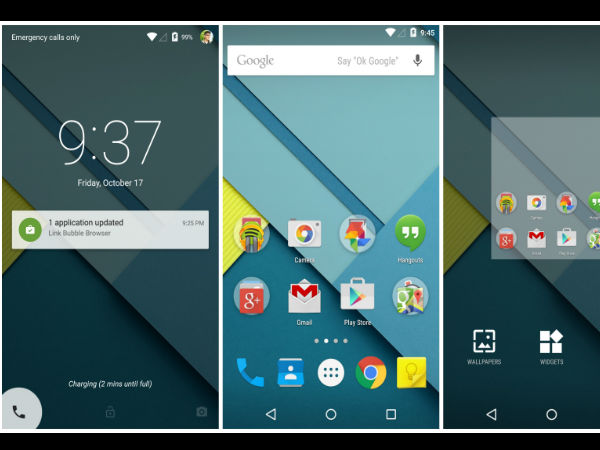
The age of KitKat is necessarily over. While it surprises us that even a few months ago KitKat remained as the choice of Android for most smartphone owners, things drastically changed with the arrival of the brand new Lollipop variant of the OS with more and more handset makers either adopting the OS or updating its own smartphones with the same.
And why not? When KitKat first made its mark, it made a name for itself with all the new and updated feature Google was providing with the OS. And now with the Lollipop already making its mark, things are more or less the same.
But while the new Lollipop update is already live, it will still take some time before it finally reaches out to the masses. And if you are the proud owner of a Samsung Galaxy S5 and waiting for the update, we have some good news. You can now update your handset to the Lollipop. And since it isn't official, here's the unofficial way to get things done. Read: rooting.

Before you can go on with it, let us tell you that rooting a handset renders its warranty void, meaning you will no longer be liable to get official updates in the future. You also have to make sure that the device is rooted. Also make sure that your device has more than 80 percent battery left. Else, there is chance of the smartphone getting temporarily bricked if the installation process is interrupted midway.
We are using new CyanogenMod M12 series Android 5.0 Lollipop firmware, and this requires clearing of memory in the smartphone, so make sure to back all the data by installing Clockwork Mod (CWM) Recovery/ TWRP in the smartphone.
Note: Perform the following actions on your handset at your own risk as there are chances that your handset might start acting up strangely. GizBot or OneIndia isn't responsible for any damages.
Here are the steps to install Android 5.0 on your Samsung Galaxy S5
Step 1
Download CyanogenMod Android 5.0 Lollipop CM12 Alpha series Custom ROM and Google Apps to your PC. Also, connect the handset to the PC via a USB cable.
Step 2
Now, place the Android 5.0 Lollipop Alpha CM12 Custom ROM zip file into the phone's SD card memory. It is absolutely mandatory to paste is nowhere else than the SD card. Also makes sure that the device is rooted and has ClockworkMod Recovery/TWRP tool installed.
Step 3
Now, turn off the device and disconnect from the PC.
Step 4
Next, perform the usual Recovery Mode operation by press holding 'Volume (up)', 'Home' and 'Power' buttons.
Step 5
When inside the RECOVERY mode, clear the phone memory by selecting 'wipe data/factory reset'. You can always use 'Volume' keys to navigate and 'Power' button to select options while operating under Recovery Mode.
Step 6
Now, clear the cache memory by choosing 'wipe cache partition.'
Step 7
Next, go back to ClockworkMod recovery, and select 'advanced' and tap 'wipe dalvik cache'. This procedure, although optional, is recommended so that the user will not face boot loops or any other similar errors during installation.
Recommended: Top 10 HTC Corporation Smartphones You Could Buy This December
Step 8
Once that is out of the way, come back to the main recovery screen and tap 'install zip from SD card'.
Step 9
Next, tap 'choose zip from sdcard' and go to Android 5.0 Lollipop ROM .zip file in SD card and enter the installation process. You will have to repeat the procedure to install Google Apps as well.
Step 10
When the installation process is done, navigate to '+++++Go Back+++++' and re-start the device by opting 'reboot system now' seen in the recovery menu.
Here on, your Galaxy S5 should take a few minutes to complete the booting process. Once that's over, go to settings and confirm the installation of the new CyanogenMod.
Stay tuned to GizBot for more updates!
[Source: XDA Devs]
-
99,999
-
1,29,999
-
69,999
-
41,999
-
64,999
-
99,999
-
29,999
-
63,999
-
39,999
-
1,56,900
-
79,900
-
1,39,900
-
1,29,900
-
65,900
-
1,56,900
-
1,30,990
-
76,990
-
16,499
-
30,700
-
12,999
-
3,999
-
2,500
-
3,599
-
8,893
-
13,999
-
32,999
-
9,990
-
12,999
-
25,377
-
23,490


