Just In
-

-

-

-


Don't Miss
-
 Ranbir- Alia 2nd Wedding Anniversary: Couple Gives Minimalist Style Goals For Intimate Celebration, Pics!
 -
 IPL 2024 Memes: 'Mera Role Model Hardik Pandya...' - DC all-rounder brutally Trolled for following MI Captain
 -
 Kannada Actor Dwarakish Death Reason: Son Reveals Last Moments Of Veteran Actor-Filmmaker
 -
 Karnataka SSLC Results 2024 Expected Soon: How To Check SSLC Result 2024 Karnataka Via Digilocker?
 -
 Gujarat Board Class 10, 12 Results To Be Declared Soon, Check out for more Details
 -
 Indian Rupee Hits Record Low Amid Middle East Concerns And Fed Rate Speculations
 -
 Who's At Fault? The Complex Liability Of Autonomous Vehicles
 -
Maximise Your First Indian Adventure With These Travel Tips
How to get Zune to work on Mac?
Most of the users think that it is quite impossible to make Zune work with Apple based Mac OS X considering the fact that Zune was introduced by Microsoft as a digital media player that is compatible with the Windows machines. But the reality is that making use of Zune on Mac OS X is very well possible. Here, the users will have to take the complete advantage of ready-to-install Boot Camp program that has been especially designed for Mac OS X.
So what a Boot Camp Really is?
Boot Camp helps in partitioning the hard drive as well as helps extensively in the installation of any of the Windows Operating System. One of the important requirements is that users should make use of Windows Service Pack 3 or later as far as Zune is concerned.

The following steps have to be followed in a step by step manner without fail;
Go to Apple Support website for Boot Camp
Download the latest update that is compatible with the computer that the user possesses. For more clarity, the users are advised to check resources
Users will have to restart their computer
Log In as an Administrator
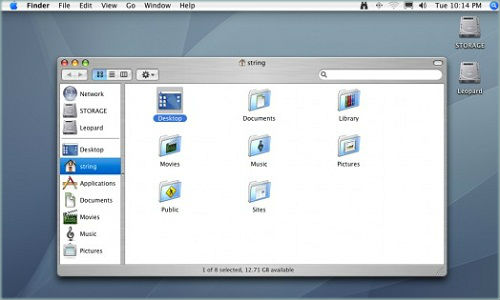
In the home screen of users Apple Mac Computer, they will have to select the icon titled ‘Macintosh HD’
Inside the icon, users can see an option titled ‘Applications’ that will be present on the left side of the window
Click ‘Applications’
Then Click ‘Utilities’
In Utilities, click ‘Boot Camp’
Now the users can see that ‘ The Boot Camp Assistant Program Window’ pops up on the screen
In the window, users will have to click ‘Continue’ in order to continue the Windows 7 installation processes
The circle that separates the amount of hard drive space for both Mac OS X as well as Windows 7 has to be clicked and should be kept on hold
Navigating the circle towards left will increase the space for Windows 7
Similarly moving the circle towards right will increase the hard drive space for Mac OS X
Click on ‘Partition’
Put Windows 7 installation disc on the optical drive of your computer
Then click ‘Start Installation’
Computer restarts loading the installation files of Windows 7 and it takes approximately up to a maximum of 45 minutes
Select Language
Select Time
Select Keyboard Settings
Click Next
Again Click ‘Install Now’
Then select ‘BOOTCAMP’
Click Next
Now Windows 7 will start installation and finally windows 7 will boot up on the set up screen
In Set up screen, users will have to enter username as well as password and the product key and finally clicking OK will take them to the Windows 7 Home Screen
Remove the Windows 7 installation disc
Place the Mac OS X installation disc
The user will now be welcomed by a ‘Boot Camp Installer’
Click ‘Next’
Accept the license agreement after reading if the user wishes to move forward
Check mark the box that helps in the Apple update for Windows
Click Install
The required drivers will be installed
Once the installation is complete, restart the computer
Now the users will have to click the ‘Option’ button
Select ‘Windows 7’
Click ‘Enter’
Open a new browser
Download the Zune Software
Install the Zune software
It provides users access to the Zune Market Place
Now open the Zune software
Connect Zune Player to the user’s computer
Now the users will have to finally set up their device on to the computer
-

-

-
-

-

-

-

-

-

-

-

-

-
 99,999
 -
 1,29,999
 -
 69,999
 -
 41,999
 -
 64,999
 -
 99,999
 -
 29,999
 -
 63,999
 -
 39,999
 -
 1,56,900
 -
 79,900
 -
 1,39,900
 -
 1,29,900
 -
 65,900
 -
1,56,900
-
 1,30,990
 -
 76,990
 -
 16,499
 -
 30,700
 -
 12,999
 -
") 3,999
3,999 -
") 2,500
2,500 -
") 3,599
3,599 -
 8,893
8,893 -
 13,999
 -
 32,999
 -
 9,990
9,990 -
 12,999
 -
 25,377
 -
 23,490
Once the process is finished, the users will now have to:
Now the users will have to
Now the users can make Zune work on their Apple Mac computer.