Just In
- 6 hrs ago

- 8 hrs ago

- 8 hrs ago

- 9 hrs ago

Don't Miss
- Education
 JEE Main Result 2024 Out, Telangana's 15 Toppers Shine, Check Statewise List of 56 Candidates with Perfect 100
 - Sports
 Who Won Yesterday's IPL Match 40? DC vs GT, IPL 2024 on April 24: Delhi Capitals Clinch High-Scoring Thriller At Kotla
 - News
 Mangalsutra Row: Did Indira Gandhi Donate Gold During The 1962 War? The Facts Behind Priyanka's Claim
 - Movies
 Kota Factory 3 OTT Release Date, Platform: When Will Jitendra Kumar's Web Series Premiere On Netflix?
 - Lifestyle
 Backless Dress: 7 Tips For Choosing Perfect Bra For Backless Outfits And Turn Heads Wherever You Go
 - Travel
 Escape to Kalimpong, Gangtok, and Darjeeling with IRCTC's Tour Package; Check Itinerary
 - Finance
 DCB Bank Q4 Results: PAT Grew 9% To Rs 156 Cr, NII Jumps 4.5%; Dividend Declared
 - Automobiles
 Aston Martin Vantage Launched In India At Rs 3.99 Crore
How to create a remotely accessible networked storage using your Wi-Fi router and a hard drive
With your very own networked storage you can now access all your data stored remotely without the safety and security threats that come with cloud storage
If you are someone who has tons of data and frequently need to access it remotely, but cloud storage isn't an option, because of what it costs and the possible security threat. We have a simple hack which will help you easily overcome this issue.

How? Well, it's most likely that you already have the hardware for it but weren't aware you could use it. Let's see what it is.
ALSO SEE: TRAI plans to provide public Wi-Fi at just Rs. 20/GB

What you will need:
To begin with, you will need a Wi-Fi router with a USB port and an external hard drive which may range from a few GB to the biggest 16TB, based on your requirement. With these, you can create a networked storage which you and others sharing your Wi-Fi network can access remotely. This makes it better, cheaper and much more secure than cloud storage.

How to start off:
Now that you have the required materials, you can plug your hard drive into your Wi-Fi router and proceed with setting it up by following few simple steps. Using a computer connected to your Wi-Fi network, launch a browser and navigate to your router's IP address. You can also find it on the back of the router or even in the router's manual. The device's IP address should look something like this (192.755.#.#.#).

How to set-up:
Once the page on the browser loads it will ask you to log-in with your credentials if you have created an account earlier use those credentials to log-in. If you haven't then by default the username and password will most likely be admin.
Though in some cases it will be provided to you in the manual or inside the router's pack. Using these credentials you will need to log-in and reset the username and password now or at a later time.

How to enable file sharing:
Here you must note while the functions remain the same, the options and setting vary from router to another, they will mostly likely have its own interface.
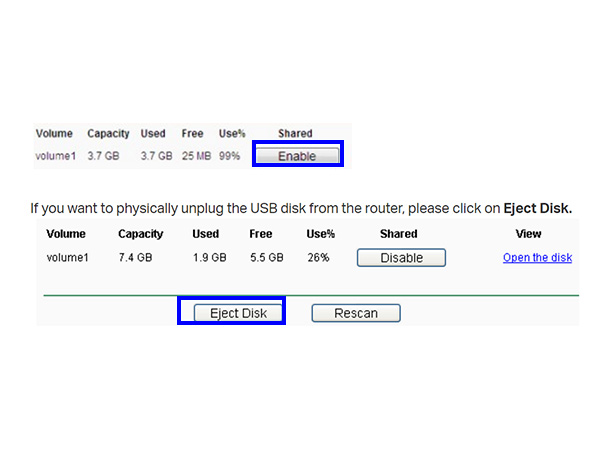
That being said, once you have logged in you will have to go to the Administrator settings, in this window you will find an option to enable file sharing server. Once you have enabled it you can apply the changes or settings and exit.

How to access your drive:
Now, your hard drive will be available to read and write onto, next you will need to open a file explorer and navigate to the Network folder. After that, you will need to add the IP address in the Address Bar, which will make the drive appear.
You can now access the drive like a regular folder by simply clicking on it, in case you receive a message to log-in, use the same credentials as before and log-in.

How to access the drive remotely:
This requires you to simply leave your drive plugged into your router and leaving it switched on, so now your drive can be accessed by you and people on your Wi-Fi network remotely. You could name it to make locating the folder more convenient. And that's it you will now be able to access your drive remotely from any Explorer window.
-
99,999
-
1,29,999
-
69,999
-
41,999
-
64,999
-
99,999
-
29,999
-
63,999
-
39,999
-
1,56,900
-
79,900
-
1,39,900
-
1,29,900
-
65,900
-
1,56,900
-
1,30,990
-
76,990
-
16,499
-
30,700
-
12,999
-
11,999
-
16,026
-
14,248
-
14,466
-
26,634
-
18,800
-
62,425
-
1,15,909
-
93,635
-
75,804


