Just In
- 2 hrs ago

- 3 hrs ago

- 3 hrs ago

- 4 hrs ago

Don't Miss
- Finance
 Rs 2.20/Share Dividend Declared: 84-Yrs Old Small Cap Tata Co Reports 7.7% Rise In Net
 - Movies
 Rohit Saraf, Pashmina Roshan Starrer Ishq Vishk Rebound Delayed Again Despite Being Fully Ready
 - News
 Goa's Railway Renaissance: BJP's Vision Transforms Connectivity
 - Lifestyle
 Anant Ambani-Radhika Merchant's Wedding Function Details Are Out, Check out Ambani Bahu-To-Be's Chic Fashion!
 - Sports
 IPL 2024: 'MI players have not bought into Hardik Pandya as the captain', Ex-India player makes shocking claims
 - Education
 Meet Naima Khatoon, First Vice Chancellor of AMU, Know Her Background and Education Qualification
 - Automobiles
 Nissan Magnite Achieves 1 Lakh Unit Sales Milestone: Consistency Helps
 - Travel
Kurnool's Hidden Gems: A Guide To Exploring India's Lesser-Known Treasures
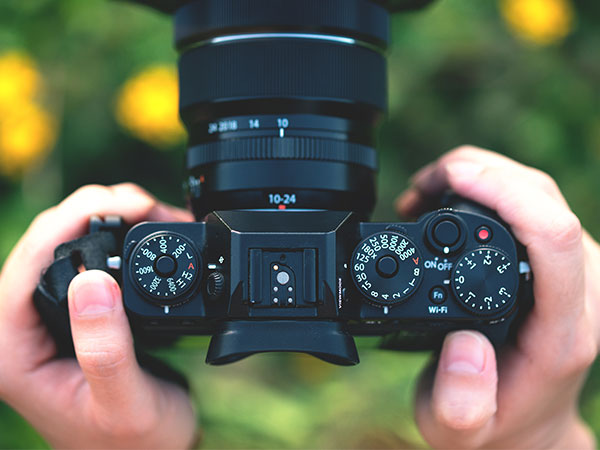
Different Modes on DSLR Camera Explained
Here are some photography terms that you need to know.
These days buying a brand new DSLR and traveling to places has become a trend now. Moreover, Photography is one of the hobbies that a person can have to keep the creative side alive.

If you are planning to or have bought a new DSLR camera, you need to understand it first before using it. In an attempt to help you we have compiled a list of terms you need to know before you jump into photography.

Auto Mode
This is the mode, where the camera automatically chooses the optimal shutter speed, aperture, ISO and flash settings for your shot. In this case, no adjustment needed and all you need to do is point and shoot. If you are new to DSLR or have no idea, you can use this mode to take some quick shots.
SEE ALSO: Best Dual Rear Camera Smartphones to buy In India

Portrait Mode
This mode can be used when you want the subject in the foreground of the frame and choose a shallow depth of field in order to keep the subject in focus and blur the background. This mode works well in well-lit conditions and if the surrounding is dark, it will automatically add flash.

Macro Mode
This mode comes handy when you want to take a picture of an image that is so small. However, you need to have a separate Macro lens to achieve this shot with perfection. This mode will work best in bright conditions and will choose a shallow depth of field to focus on the subject.

Landscape Mode
Unlike the portrait mode, this mode uses a small aperture to create a focused image from the foreground into the distance. This mode works best in daylight conditions and needs a wide-angle lens to achieve the perfect shot.

Sports Mode
As the name implies, this mode is used to capture the subject that is in constant move. For eg, cycling, players in the football stadium, and much more. In this mode, you should have a high shutter speed of at least 1/500 - 1/1000 of a second. Thie helps to freeze movement perfectly without blurring the subject. You can also set the continuous shooting mode in this mode to capture images consecutively.

Night Portrait Mode
This mode balances the darkness of the background along with the need to light the subject in the foreground. In this mode, the aperture will be wide to allow more light to capture the background and keep the subject in focus. If there is no enough light, flash can be used to fill in space as well.

Shutter-Priority Mode
In this mode, a user will manually set the camera's shutter speed and on the other hand, the camera automatically picks the right aperture based on the of light. This mode is used when you need to freeze motion. If there is too much light, the camera will increase the lens aperture to a higher number, which decreases the amount of light that passes through the lens and vice versa. Also, you won't be having the control to a depth of field as well.

Aperture-Priority Mode
In this mode, the user manually set the lens aperture, while the camera automatically picks the right shutter speed. Here, you will have the full control over subject isolation and you can play with the depth of field. If it is too much light, the camera will automatically increase the shutter speed, and vice versa.

Manual
As the name suggests, you have to control every aspect of the camera including Shutter Speed, Aperture, ISO, Flash, Focus and everything. This mode will help you to know more about the system, as you keep using it.
-
99,999
-
1,29,999
-
69,999
-
41,999
-
64,999
-
99,999
-
29,999
-
63,999
-
39,999
-
1,56,900
-
79,900
-
1,39,900
-
1,29,900
-
65,900
-
1,56,900
-
1,30,990
-
76,990
-
16,499
-
30,700
-
12,999
-
14,999
-
26,634
-
18,800
-
62,425
-
1,15,909
-
93,635
-
75,804
-
9,999
-
11,999
-
3,999


