Just In
- 6 hrs ago

- 7 hrs ago

- 7 hrs ago

- 8 hrs ago

Don't Miss
- Movies
 Do Aur Do Pyaar OTT Release Date & Platform: When & Where To Watch Vidya Balan’s Film After Theatrical Run?
 - Lifestyle
 Deepika Padukone's 6 Refreshing Skincare Tips to Beat the Summer Heat
 - Sports
 UFC 302: Makhachev vs. Poirier Date, Card, Broadcast & Ticket Details
 - Finance
 Wipro Q4 Results Preview: Weak Demand Likely To Drag Revenue Sequentially, EBIT Margins Seen Stable
 - News
 BRS Chief K Chandrasekhar Rao Slams BJP, Says K Kavitha's Arrest Is Vendetta Politics
 - Automobiles
 Aprilia RS 457 Accessories: A Detailed Look At The Prices
 - Education
 Karnataka SSLC Result 2024 Soon, Know How to Check Through Website, SMS and Digilocker
 - Travel
Telangana's Waterfall: A Serene Escape Into Nature's Marvels
Facebook Guide: 4 Steps to Create A Facebook Account without Phone Number
There are many instances where we are not willing to provide our personal or even official phone numbers on public platforms. One such platform is Facebook.

This is a social media platform from where any anonymous person can get access to your personal details like the phone number. Hence, privacy is the major concern for all Facebook users. So, it is advisable to keep the privacy setting of your account rigid.
See Also: How to Download Facebook Videos for Free [2 Simple Ways]
And the process starts while signing up for Facebook. While you are registering yourself, Facebook gives you two options either you can provide your email id or phone number.
So here is a way you can avoid providing your personal contact details to Facebook and still create an account.
See Also: Facebook Tips: 3 Simple Methods to Find Out Friend Requests Sent by You

Step 1. Use ThrowAwayMail
This website creates a temporary email address. So go to throwawaymail.com and copy the email address generated on the box.

Step 2. Create An Account on Facebook
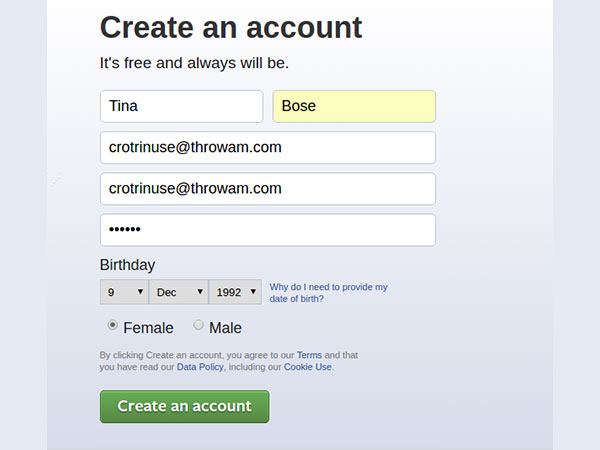
Now on the Facebook website, fill the details for signing up. While entering email id, paste the temporary id you have got from throwawaymail.com. Then, hit Sign up.
See Also: 5 Signs to Spot A Fake Facebook Profile

Step 3. Skip the recovery phone number option
Once you are done with the above process, Facebook will ask you to enter a phone number for quick recovery of your account. You can skip this stage easily.

Step 4. Verification
Now, Facebook will send you a verification mail to the provided email address. You have to go back to throwawaymail.com and click on the mail. You'll get a verification number which you have to enter in the dialog box on the Facebook website. Once this is done, you are good to go!
-
99,999
-
1,29,999
-
69,999
-
41,999
-
64,999
-
99,999
-
29,999
-
63,999
-
39,999
-
1,56,900
-
79,900
-
1,39,900
-
1,29,900
-
65,900
-
1,56,900
-
1,30,990
-
76,990
-
16,499
-
30,700
-
12,999
-
62,425
-
1,15,909
-
93,635
-
75,804
-
9,999
-
11,999
-
3,999
-
2,500
-
3,599
-
8,893


